


How to Drill a Deadbolt Lock: Fast & Easy Steps

Deadbolt locks are a crucial component of home and business security, offering a level of protection that standard locks cannot match. Unlike spring-loaded locks that can be easily bypassed with a credit card or other simple tools, deadbolts are designed to resist forced entry by remaining securely in place unless the correct key is used. However, there are situations where drilling out a deadbolt lock becomes necessary. This could be due to lost keys, a malfunctioning lock, or when you're replacing the lock and the old one is difficult to remove. In this comprehensive guide, we’ll walk you through the entire process, ensuring you can drill a deadbolt lock safely and efficiently.
Tools and Materials Needed
Before attempting to drill a deadbolt lock, it's essential to gather all the necessary tools and materials. Having everything ready will make the process smoother and reduce the risk of mistakes. Here’s a detailed list of what you’ll need:
-
1. Power Drill
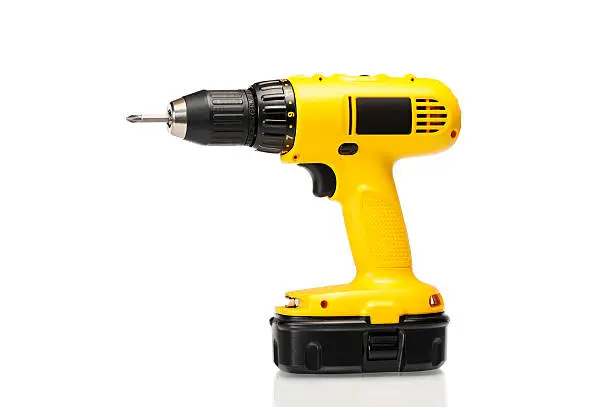
A power drill is your primary tool for this task. Ensure that the drill you use is high-powered enough to handle metal surfaces. A cordless drill with variable speed settings is ideal, as it allows for better control.
-
2. Drill Bits
For drilling through metal, you'll need a variety of drill bits. Start with a smaller bit (around 1/8 inch) to create a pilot hole, then move to a larger bit (typically 1/2 inch) for the main drilling. Titanium or cobalt bits are recommended for their durability and ability to cut through hard materials.
-
3. Center Punch
A center punch is a simple but essential tool for marking the spot where you'll drill. It creates a small indentation in the metal, ensuring that your drill bit stays in place and doesn’t wander off target.
-
4. Lubricant
Drilling through metal generates a significant amount of heat, which can dull your drill bit or even damage the lock. Use a cutting oil or another suitable lubricant to keep the drill bit cool and reduce friction.
-
5. Safety Glasses

Safety should always be a priority. Wear safety glasses to protect your eyes from metal shavings and debris that can fly off during drilling.
-
6. Gloves
Sturdy work gloves will protect your hands from sharp edges and prevent injuries while handling the tools and lock components.
-
7. Screwdriver
After drilling out the lock, you may need a screwdriver to remove screws that hold the lock in place or to disassemble the lock further. A set of both flathead and Phillips screwdrivers will cover most needs.
-
8. Tape Measure

A tape measure is useful for ensuring that you’re drilling in the correct location and that the hole size is accurate for your specific deadbolt.
-
9. Masking Tape
Optional, but helpful, masking tape can be used to mark your drill bit to ensure you don’t drill deeper than necessary.
How Long Does it Take to Drill a Deadbolt Lock?
The duration of the drilling process can vary depending on several factors. On average, drilling a standard deadbolt lock can take anywhere from 15 to 30 minutes. However, this time frame can be extended if:
- High-Security Deadbolt: If you're dealing with a high-security deadbolt, it may take longer due to additional anti-drill plates or hardened steel components designed to resist drilling.
- Inexperienced Users: If this is your first time drilling a deadbolt lock, expect to spend more time on each step to ensure accuracy and avoid damaging the door or lock.
- Tool Quality: The quality of your tools also plays a significant role. A powerful drill with sharp, durable bits will make the job faster and easier.
Being patient and methodical is key. Rushing the process can lead to mistakes, such as misaligned holes, which can damage the door and make lock replacement more difficult.
How to Drill a Deadbolt Lock? Step-By-Step
Drilling out a deadbolt lock is a precise task that requires careful attention to detail. Here’s a step-by-step guide to help you complete the job effectively:
1. Prepare Your Workspace

- Clear the area around the door to ensure you have enough space to work comfortably. Good lighting is crucial, so set up extra lamps if necessary.
- Make sure the door is securely closed or locked, as this will prevent it from moving during the drilling process.
- Put on your safety glasses and gloves before beginning.
2. Mark the Drill Point
- Use your center punch to create a small indentation in the center of the deadbolt cylinder. This mark is where you’ll start drilling. If the deadbolt has an exposed keyhole, center your punch on the keyhole.
- Double-check your alignment to ensure that you’re drilling in the right spot.
3. Drill a Pilot Hole
- Attach a 1/8-inch drill bit to your power drill. This smaller bit will create a pilot hole that helps guide the larger bit in the next step.
- Begin drilling at the center-punched spot. Apply steady, even pressure to avoid damaging the surrounding area. Take your time to ensure the hole is straight and centered.
- Switch to a larger drill bit, preferably 1/2 inch. This will be used to drill through the lock cylinder.
- Lubricate the drill bit with cutting oil before starting to reduce friction and heat buildup.
- Slowly drill into the pilot hole, keeping the drill as straight as possible. You may encounter resistance as you go through different components of the lock, such as the pins and springs. Continue applying lubricant as needed.
5. Drill Through the Lock Cylinder

- As you drill, the lock components will start to break apart. You should feel the drill bit pass through the various parts of the cylinder.
- Continue drilling until the cylinder is completely compromised, allowing the lock to be disengaged.
6. Remove the Lock
- Once the cylinder has been drilled out, use a screwdriver to remove any remaining screws that hold the deadbolt in place.
- If the lock doesn’t easily come out, gently pry it loose with the screwdriver.
7. Inspect and Clean the Hole
- After removing the lock, inspect the hole to ensure it is clean and ready for a new lock installation. Remove any metal shavings or debris left behind from the drilling process.
Conclusion
Drilling a deadbolt lock is a task that requires precision and the right tools, but with careful preparation, it can be done effectively. Whether you're dealing with a lockout situation, replacing an old lock, or simply learning a valuable skill, knowing how to drill out a deadbolt lock is useful.
For those in need of a new deadbolt lock after drilling, Park Avenue Locks offers a wide selection of high-quality deadbolt locks available for both retail and wholesale customers. Our products are known for their durability and security, ensuring you can find the perfect solution for your needs. Visit our website to explore our offerings and secure your property with confidence.
Frequently Asked Questions
How big of a hole do you drill for a deadbolt?
For a standard deadbolt lock, you typically drill a 2-1/8 inch diameter hole for the lock body, along with a 1-inch hole on the edge of the door for the latch.
Are Deadbolt Holes Standard?
Yes, most deadbolt holes are standardized at 2-1/8 inches in diameter for the main lock body. However, it’s always good to check the specifications of your lock before drilling.
How do you make a deadbolt strike hole deeper?
To deepen a deadbolt strike hole, you can use a chisel to carefully remove more material from the door jamb. Ensure the depth matches the length of the deadbolt’s throw to secure the lock properly.